Copy information from imported associates
When you’ve imported a list of associates from your data provider, you can copy the information from any imported associate to an associate already on the verification list.
This is an especially useful feature when your workflow starts with adding associates manually. You can add an associate, only providing their name and, if the associate is a company, their country of incorporation. Then you can import a list of associates from one or more data providers to get the full details of the associates and copy those details into your verification list. To learn more about importing associates, see Add company associates to a verification list.
The following fields are completed automatically and cannot be edited:
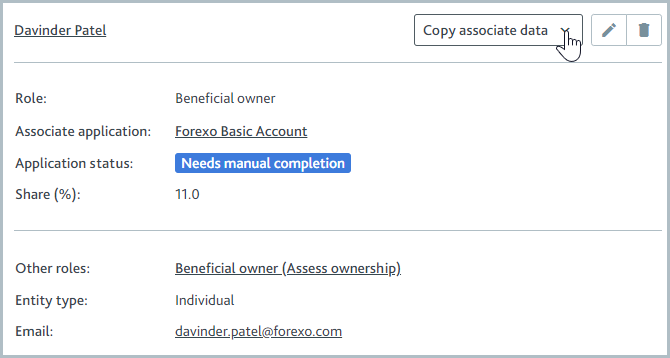
Application status: Indicates the status of the associate’s verification and approval. To learn more, see About the associates verification list.
Other roles: When the associate appears on multiple verification lists as part of this product application, every role the associate is being verified for is displayed here, for example, Director and Beneficial Owner.
Note
To edit an authorized person’s relationship, add a new authorized person with the same name. When you add the new authorized person, the Create new authorized person dialog is displayed where you can enter the relationship you want to use into the Relationship field. When the Resolve possible duplicates dialog is displayed, select the original profile. To learn more, see Resolving possible duplicates.
To copy information from an imported associate to an associate on the verification list:
Locate the associate on the Active tab of the verification list.
Note that you can't copy associate data to associates on the Removed tab.
Open the drop-down. A list of every imported associate of the same type, either individual or company, is displayed. Associates are grouped by the data provider used to import them.

This drop-down is only displayed after you’ve imported at least one associate.
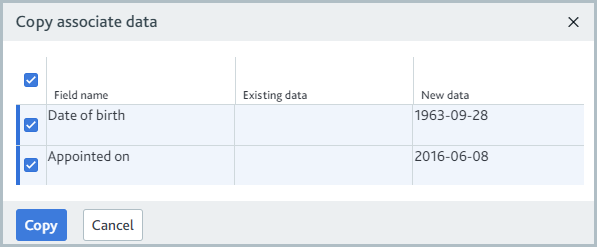
Select an associate on the list. The Copy associate data dialog is displayed.
The name of every field that can be copied is displayed in the Field name column.
The data for the associate in the verification list is displayed in the Existing data column.
The data of the imported associate is displayed in the New data column.

If the imported associate does not have data for a particular field, that field is not displayed in the dialog.
By default, all available data is copied from the imported associate. Deselect any data you don’t want to copy.
Select . The data of the associate on the verification list is updated to match the selected imported data.